Omnisend Magento Integration: How to Connect Your Store
To set up Omnisend Magento integration, install the Omnisend extension on your Magento 2 (Adobe Commerce) store, paste your Omnisend API key into the admin settings, and confirm that customers, orders, carts and products show up in Omnisend. After that, switch on your core automations, starting with the welcome series and abandoned cart flow.
The common failure is a quiet one. The module installs without errors, but nothing syncs. Or carts never reach Omnisend, so abandoned cart emails never fire. Or products arrive with missing prices and images. Magento's custom themes, full-page cache and checkout changes cause most of these problems, and none of them announce themselves.
This guide walks through the prerequisites, the install, the connection, the verification checks and the first flows to launch. At Chromex Marketing we are an official Omnisend partner and run email and SMS programs for ecommerce brands, so the checks below come from the mistakes we see most often.
Before you start: what you need and what syncs
The integration copies four types of data from Magento into Omnisend: customers, orders, carts and products. Omnisend uses that data to segment shoppers, trigger automations and personalize emails and SMS. The extension is open source on GitHub and also listed on the Adobe Commerce Marketplace.
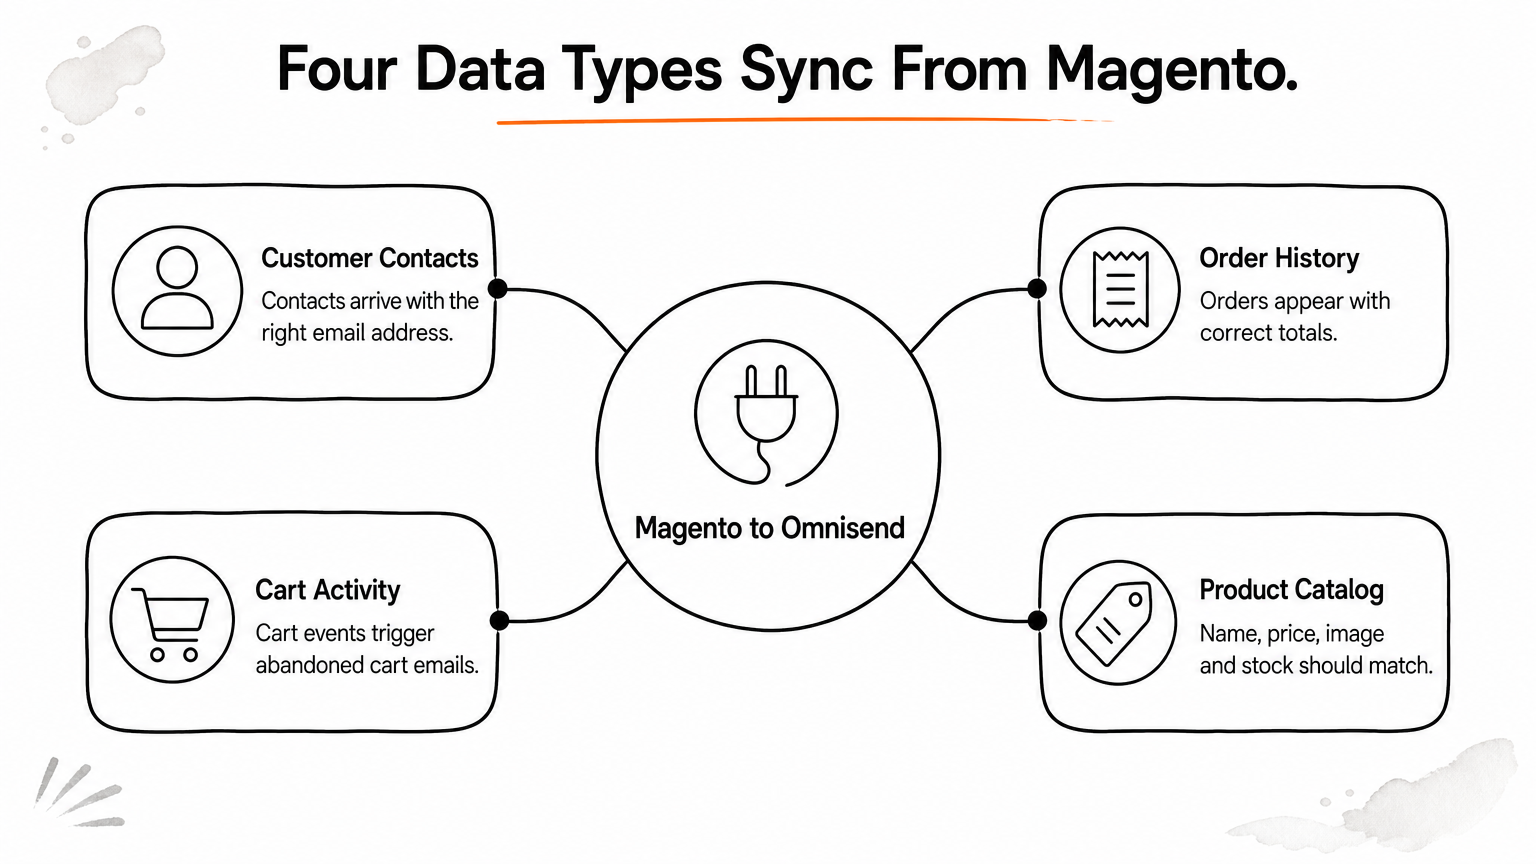
What to prepare
Gather these before you touch the server:
- A Magento 2.x or Adobe Commerce admin login (the extension does not apply to Magento 1).
- SSH and Composer access, or a developer who has both.
- A staging copy of your store, plus a fresh backup.
- An Omnisend account. Chromex is an official Omnisend partner, and sign-ups through our link get 20% off the first 2 months, offered as cashback.
Install on staging first, because a module that breaks checkout costs far more than the hour you save.
Is Omnisend the right tool for your store?
Omnisend is built for ecommerce and runs email and SMS in one platform, with a free plan to test the connection. Mailchimp is a general-purpose tool, so you will usually do more manual work to get ecommerce triggers right. Klaviyo is the other ecommerce-first option, and the choice mostly comes down to budget and how much SMS you plan to send. Magento itself remains in active use, and Adobe continues to develop it as Adobe Commerce.
Step 1. Install the Omnisend extension
Install the extension with Composer, then run Magento's standard upgrade and compile commands. Use the package name from the plugin's GitHub README or the Marketplace listing, so you get the current release and not an outdated one.
Run the install commands
Run these over SSH from your Magento root, on staging first:
composer require <package-name-from-the-README>
bin/magento setup:upgrade
bin/magento setup:di:compile
bin/magento setup:static-content:deploy -f
bin/magento cache:flush
bin/magento module:status | grep -i omnisend
The last line should list the Omnisend module as enabled. If you install from the Marketplace, the package comes through your Marketplace account and its Composer access keys. On Adobe Commerce Cloud, commit the change and deploy through your normal pipeline instead of running commands live.
If you cannot install modules
Some hosts lock down Composer. In that case you have two options. Developers can use the Omnisend API to pass contact, order and event data from a custom build. Alternatively, a no-code connector can move orders and customers between Adobe Commerce and Omnisend. Connectors usually sync fewer data types and add a monthly fee, so treat them as a fallback.
Use the official extension whenever you can, because it covers carts and products that most workarounds skip.
Step 2. Connect your store with an API key
Create an API key in your Omnisend account, then enter it in the Omnisend section of your Magento admin configuration. The key links your store to your Omnisend account, so keep it private.

Create the key and enter it
In Omnisend, open your store settings and create a new API key. Copy it once and store it in your password manager. In Magento, go to Stores > Configuration and find the Omnisend section. Paste the key, enable the integration and save. Follow any on-screen prompt the extension shows, since the exact fields can change between versions.
Set the scope and flush the cache
If you run several store views, set the configuration at the right scope, so each view connects to the Omnisend account you intend. Then flush the cache from System > Cache Management. A stale configuration cache is the most common reason a freshly connected store looks dead.
Connect one store view at a time, because mixed scopes send customers to the wrong Omnisend account.
Step 3. Verify that the sync works
Test the four data types with real actions, not just a green status message. Allow a few minutes for data to arrive, then compare Magento and Omnisend side by side.

Run a four-point test
| Data | Test in Magento | What to check in Omnisend |
|---|---|---|
| Customers | Create a test customer account | The contact exists with the right email |
| Products | Pick one product with a sale price | Name, price, image and stock match |
| Carts | Log in, add an item, start checkout | A cart event appears on the contact |
| Orders | Place a test order | The order appears with correct totals |
Use a real inbox you control, so you can also see what the customer receives.
Check consent before you send
Look at how each contact's email subscription status arrives. A customer who only checked out is not automatically a marketing subscriber. For SMS, US rules require clear consent before you send marketing texts. Fix the mapping now, because a wrong default is far harder to undo after your first send.
A sync is only working when all four data types match, so test each one by hand.
Step 4. Launch your core automations
Start with the four flows that earn revenue fastest: welcome series, abandoned cart, browse abandonment and post-purchase. Omnisend provides pre-built workflows for these, so you edit copy and timing instead of building from scratch.
Start with these flows
- Welcome series: trigger on sign-up and send 2 or 3 emails over the first week.
- Abandoned cart: send a first email about 1 hour after abandonment and a second after 24 hours. Add a third with an incentive only if the first two fall flat.
- Browse abandonment: target visitors who viewed products but never added to cart.
- Post-purchase: thank the customer, then follow up with a cross-sell and a review request.
Add a sign-up popup too, so your list grows while the flows run. Keep a holdout of recipients out of each flow for a few weeks if you want a clean read on lift.
Know when to hand it off
Eight core sequences, a tested sign-up form and a deliverability check are a lot of work beside running a store. That is the build-out we do in our Create step, which runs on days 5 to 15 after the audit. If you want it done for you, see the next section.
Launch the abandoned cart flow first, because it recovers revenue from traffic you already paid for.
Get your Omnisend setup running
Connecting Omnisend to Magento comes down to four moves: install the official extension on staging, connect it with an API key, verify customers, products, carts and orders by hand, and launch the core flows. Skip the verification and you will find sync gaps through lost revenue, not through a test.
If you would rather hand off the strategy, flows and design, talk to Chromex about running your Omnisend email and SMS program. We start with an audit and a 60-day plan, then build the flows and keep testing them.