How to Connect Omnisend to WooCommerce and Set Up Flows
To set up Omnisend WooCommerce, create an Omnisend account, install the "Email Marketing for WooCommerce by Omnisend" plugin from your WordPress dashboard, and connect your store so contacts, products, and orders sync. Then test the connection with a real order, publish a sign-up form, authenticate your sending domain, and switch on your core automations. The connection itself takes a few minutes. Getting the setup right takes an afternoon.
Most stores stop at "plugin installed." The dashboard says connected, so everyone assumes it works. Then the abandoned cart flow never fires because shoppers are never identified. Customers who never opted in get promotional emails. WooCommerce and Omnisend both send an order confirmation, so buyers get two. We manage email and SMS programs for ecommerce brands, and we are an official Omnisend partner, so we see these gaps in audits all the time.
This guide walks you through seven steps in the order we would do them, from account creation to SMS. Each step ends with something you can check, so you know it worked before moving on. A troubleshooting table at the end covers the problems that come up most often.
What the Omnisend WooCommerce integration does
The Omnisend WooCommerce integration is a plugin that links your store to Omnisend, so customers, products, orders, and shopping behavior reach your email and SMS tool without manual exports. Once connected, Omnisend can send a message the moment a shopper subscribes, abandons a cart, or buys. You write the message once and the store data decides who gets it and when.
What syncs between the two platforms
The plugin moves four kinds of data from WooCommerce into Omnisend. Contacts and customer records are the first. Products and orders are the second and third. Shopping behavior is the fourth, which the plugin's site tracking captures as it happens.
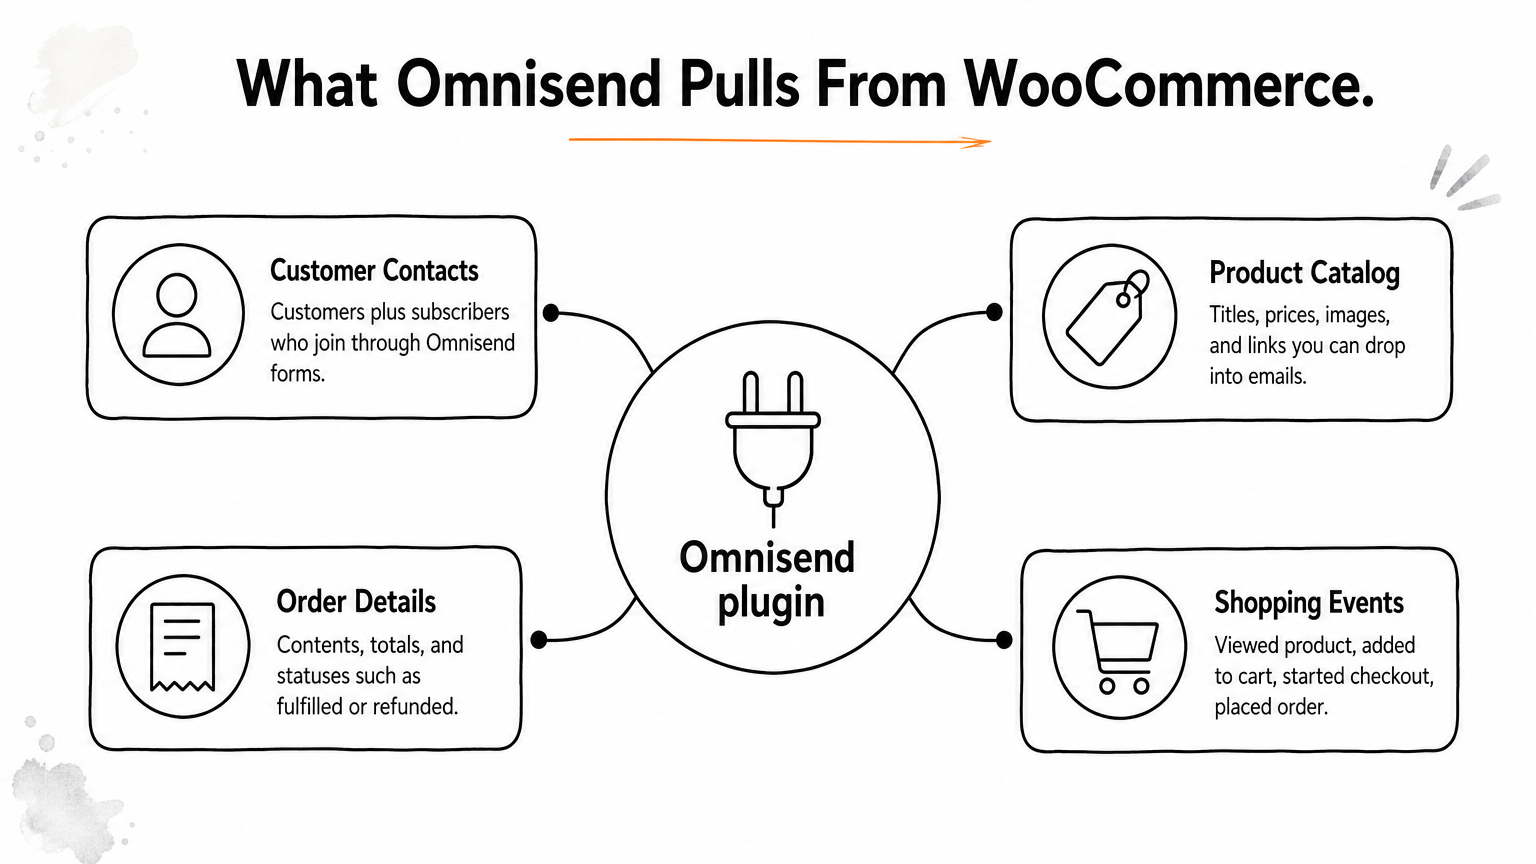
- Contacts: your customers, plus subscribers who join through Omnisend forms
- Products: titles, prices, images, and links you can drop into emails
- Orders: contents, totals, and statuses such as fulfilled or refunded
- Events: viewed product, added to cart, started checkout, placed order
Behavior events are what make this more than a mailing list. They trigger cart abandonment and browse abandonment flows, and they let you build segments such as "viewed a product three times but never bought." Without clean events, those flows sit idle.
The plugin's real job is to keep Omnisend's picture of each shopper current with what happens in your store.
What you need before you start
Gather these items first. Missing one is the usual reason a setup stalls halfway.
- Admin access to your WordPress dashboard, with WooCommerce installed and active
- A live store, not a staging copy
- Permalinks set to anything other than "Plain" (Settings, then Permalinks), because WooCommerce's REST API needs them
- Access to your domain's DNS settings, for sender authentication in Step 5
- A business mailing address for your email footer
- A recent site backup
- A decision on whether you want SMS now or later
Pricing, free plan limits, and who it fits
Omnisend lists a free plan for up to 250 contacts and 500 emails per month, a Standard plan starting at $16 per month, and a Pro plan starting at $59 per month. Prices rise with contact count, so confirm the current numbers on Omnisend's pricing page before you commit.
The free plan runs out faster than most people expect. Say you send a three-email welcome series to 100 new subscribers. That is 300 emails. Add one campaign to your list of 250 contacts and you are at 550, already over the 500 cap. Treat the free plan as a place to run your Step 4 tests, then expect to upgrade once flows go live.
The integration suits small and mid-sized stores that want email, SMS, and push notifications in one tool with ecommerce-specific flows built in. If you run very complex segmentation across a large catalog, compare it against Klaviyo first. We build on both platforms, and the right choice depends on your data, not on brand loyalty.
Step 1. Create your Omnisend account
Create your Omnisend account at omnisend.com before you touch WordPress, because the plugin needs an account to connect to. Sign up with a work email, pick WooCommerce as your platform, and fill in your store details.
Sign up and enter store details
Use the email address of the person who will own the account long term, not a freelancer's inbox. Ownership problems are painful to fix later.
- Go to omnisend.com and click the sign-up button.
- Enter your email, then choose WooCommerce when asked about your platform.
- Add your store name and website URL exactly as customers see it, including https.
- Confirm your store currency and time zone. Send times and revenue reports depend on both.
Set your sender details now
Open your store settings in Omnisend and set the from name, from email, and mailing address now. Use an address on your own domain, such as hello@yourstore.com, not a Gmail or Yahoo address. Mailbox providers treat free-mail senders on bulk mail harshly, and you cannot authenticate a domain you do not own.
Add a physical postal address for the email footer. US law (CAN-SPAM) requires a valid postal address in commercial email, and Omnisend's templates need one to publish. Do this before you build a single email so you never ship a draft without it.
Set your sender identity on day one, and use a domain you control.
Step 2. Install and activate the plugin
Install the Omnisend WooCommerce plugin from your WordPress dashboard by going to Plugins, then Add New Plugin, searching "Omnisend," and activating "Email Marketing for WooCommerce by Omnisend." The listing is also on WordPress.org if you prefer to download and upload it manually.
Install from the WordPress dashboard
- Log in to WordPress as an administrator.
- Go to Plugins, then Add New Plugin.
- Search for Omnisend.
- Find "Email Marketing for WooCommerce by Omnisend" and click Install Now.
- Click Activate when the button changes.
If you see a different plugin with a similar name, stop. Match the full name and check that the author is Omnisend. The WordPress.org listing also shows active installations and ratings, which is a quick sanity check.
Prepare your site before connecting
Take a backup first. A plugin that adds tracking scripts and syncs customer data is a meaningful change, even though most installs go smoothly. Backups take two minutes and save an afternoon if a conflict appears.
Install on your live site only. If you connect a staging copy to the same Omnisend account, test orders and fake customers flow into your real audience and reports. Also deactivate any other email marketing plugin that injects its own tracking script or popups. Two tools fighting over the same page events create duplicate forms and unreliable data.
Connect your live store once, and keep staging sites away from your Omnisend account.
Step 3. Connect your store and sync data
Connect your store by opening the Omnisend entry in your WordPress admin, clicking the connect button, and approving access when Omnisend asks. After that, the plugin starts importing your existing contacts, products, and orders.
Connect the store to your account
After activation, the Omnisend WooCommerce plugin adds a menu entry in your WordPress admin. Open it and follow the prompt to connect. Omnisend opens in your browser, you log in, and you approve access to your store. Some plugin versions instead ask for an API key. If yours does, create the key in your Omnisend store settings and paste it into the plugin field. Either way, you are done when the plugin shows your store as connected.
Do not close the browser tab mid-process. If the redirect fails, reopen the plugin page and start the connect step again. Repeating it is safe.
Check what the first sync imported
The initial import covers your historical customers, products, and orders. Stores with a few hundred contacts finish quickly. Larger stores can take longer, so give it time before you assume something is wrong. Then open Omnisend and check three places: the contact list, the product list, and a handful of orders.
The check that matters most is subscription status. Omnisend sorts contacts into three groups:
| Status | Can receive | Typical source |
|---|---|---|
| Subscribed | Marketing and transactional messages | Opted in through a form or checkout checkbox |
| Non-subscribed | Transactional messages such as order confirmations | Customers who bought but never opted in |
| Unsubscribed | No marketing messages | Opted out |
Scan a sample of customers you know never joined your newsletter. They should not appear as subscribed. If the imported statuses look wrong, fix them before you send anything. Emailing people without permission damages your sender reputation and, depending on the channel, exposes you to legal risk.
Verify consent statuses after the first sync, before any campaign or flow goes live.
Step 4. Test the Omnisend WooCommerce connection
Test the connection by playing the shopper yourself: subscribe through a form, browse a product, start checkout, and place a small order. Then confirm each action appears on your test contact's activity in Omnisend. A green "connected" badge proves the handshake worked. It does not prove events are flowing.
Run the test shopper journey
Use an email address you control, such as a plus-address on your own domain. Open a private browser window so you are not logged in as an admin. In WooCommerce, create a coupon for 100% off a cheap product (under Marketing, then Coupons) so you can complete an order without charging a card.
- Submit your sign-up form, or the checkout email field, with your test address.
- View a product, add it to your cart, and start checkout.
- Leave the cart alone long enough for your abandonment delay to pass.
- Complete a second checkout using the 100% coupon.
Confirm what Omnisend recorded
Open the test contact's profile in Omnisend and read the activity feed. Use this table as your pass or fail list.
| Test action | Where to look | Expected result |
|---|---|---|
| Form or checkout email | Contact list | New contact with the right status |
| Product view | Contact activity | "Viewed product" event with the item |
| Add to cart | Contact activity | "Added to cart" event |
| Checkout start | Contact activity | "Started checkout" event |
| Completed order | Contact activity and reports | "Placed order" event and order total |
Before we launch any flow for a client, we run a similar set of checks: triggers fire, links resolve, emails render on mobile, and a deliverability and suppression review confirms we are not mailing the wrong people. Copy that habit. Every new flow you build later deserves the same four checks.
If an event does not show up on the test contact, the flow that depends on it will not fire for real shoppers either.
Step 5. Set up forms, consent, and your sending domain
Publish one sign-up form that asks for an email first and a phone number second, add an opt-in at checkout, and authenticate your sending domain with DNS records. Together these three things decide how large your list grows and whether your emails reach the inbox.
Publish a sign-up form that earns the contact
Once your store is connected, the Omnisend WooCommerce plugin's site script lets forms you publish in Omnisend appear on your store. You do not paste form code into your theme. Build the form in Omnisend's form builder, then publish it.
A form that converts has a few traits:
- A clear offer, such as 10% off the first order or early access to drops
- Email on step one, with an optional phone field on step two for SMS
- A delay of several seconds or exit-intent, not an instant popup that blocks the page
- A mobile layout you have actually viewed on a phone
- Exclusion from checkout pages, where a popup interrupts a buying decision
Keep the incentive consistent with your margins. A discount that buyers would have used anyway just reduces revenue. Test one offer for a few weeks before changing it.
Add an opt-in at checkout
Many of your best subscribers are people mid-purchase who never see a popup. Look in the Omnisend plugin settings for the checkout opt-in option and enable it. The checkbox should be unticked by default and clearly worded, so every subscriber is a real opt-in.
Authenticate your sending domain
In Omnisend, find the sender domain section of your store settings and start domain authentication. Omnisend shows you the DNS records to add at your domain host. Add them exactly as shown, then wait for verification. Gmail and Yahoo require authentication for bulk senders, and Google's email sender guidelines spell out the rules, including keeping spam complaints low.
Authentication records come from Omnisend. A DMARC policy is separate, and you add it yourself. A safe starting record that only monitors looks like this:
Host:  _dmarc.yourstore.com
Type:  TXT
Value: v=DMARC1; p=none; rua=mailto:dmarc@yourstore.com
Replace yourstore.com with your domain and use a mailbox you actually read. Move from p=none to a stricter policy only after you have reviewed the reports and confirmed your legitimate senders pass.
Collect consent at every touchpoint, and authenticate your domain before volume grows.
Step 6. Turn on your core automations
Turn on welcome, abandoned cart, browse abandonment, post-purchase, review request, and winback flows, in that order of priority. Automated flows run without you, so they earn revenue every day, while campaigns need new work each time you send.
Start from the pre-built workflows
Omnisend ships pre-built workflows for most of these. Open each one, replace the placeholder content with your brand, and review the trigger and timing. The table shows sensible starting points. Treat the timing as a first draft and adjust it once you see your own data.
| Flow | Trigger | Suggested timing |
|---|---|---|
| Welcome series | Subscribes | Email 1 immediately, then days 2 and 4 |
| Abandoned cart | Started checkout, no order | 1 hour, 24 hours, then 48 to 72 hours |
| Browse abandonment | Viewed product, no cart | 2 to 4 hours after the view |
| Post-purchase | Placed order | Thank-you right away, shipping update on fulfillment |
| Review request | Order fulfilled | 7 to 14 days after delivery |
| Winback | No purchase for a set period | 60 to 90 days, based on your repurchase cycle |
Build the welcome and abandoned cart flows first. They catch the most immediate revenue. Browse abandonment works only for shoppers Omnisend can identify, so it depends on the email capture from Step 5. These six flows usually carry the bulk of flow revenue for a store. If you want the full picture of flows and triggers, our guide to ecommerce email automation flows goes deeper.
Abandoned cart and welcome flows should be live before any campaign you plan.
Write the abandoned cart emails
A cart flow works best as three emails with a different job each. Email 1 is a plain reminder. Email 2 handles objections such as shipping, returns, and sizing. Email 3 adds urgency or a small incentive, and only if your margin allows it. Here is a copy-ready draft for email 1. Replace the bracketed parts.
Subject: Still thinking it over, [First name]?
Preview: Your cart is saved. Checkout takes a minute.

Hi [First name],

You left [Product name] in your cart. We saved it for you.

[Button: Return to my cart]

Questions about sizing, shipping, or returns? Reply to this
email and a real person will answer.

[Store name]
Use the product picker so the actual items, images, and prices appear. A generic "you forgot something" message with no product underperforms one that shows the item.
Avoid double emails from WooCommerce
WooCommerce sends its own transactional emails, such as order confirmations. If you also build an order confirmation in Omnisend, buyers get two. Decide which tool owns each message. Go to WooCommerce, then Settings, then Emails, and disable the standard emails you are replacing. Do that only after you have tested the Omnisend version end to end, so no customer ever goes without a receipt.
If a major sale such as Black Friday Cyber Monday is close, prioritize welcome and cart flows first and queue everything else behind them. Chromex runs a one-time BFCM Email & SMS System as a done-for-you build on Klaviyo or Omnisend, but you can run this order yourself.
Step 7. Add SMS to your Omnisend WooCommerce setup
Add SMS after your email flows work. Turn it on in Omnisend, complete any sender registration, collect phone numbers with proper consent, and then insert SMS steps into your existing workflows. SMS is the fastest channel for time-sensitive messages, and it is also the one most likely to get you into legal trouble if you cut corners.
Get SMS ready
SMS usage in Omnisend is metered, and sending to US numbers requires carrier-level sender registration. Expect a registration step and a wait for approval, so start it early rather than the day you want to launch. Check Omnisend's pricing for current rates on US messages before you commit to a volume.
Long messages split into multiple segments, and each segment counts. A worked example: 1,000 SMS subscribers receiving four campaigns a month is 4,000 messages. If your copy runs long enough to split into two segments, usage doubles to 8,000. Write tight copy and keep campaign frequency low.
Collect phone numbers with valid consent
In the US, marketing texts require prior express written consent under the Telephone Consumer Protection Act. Your form must clearly say what people agree to, and the checkbox must not be pre-ticked. Here is a typical consent line to adapt. Have your attorney review the final wording.
By entering your number, you agree to receive recurring automated
marketing text messages from [Store name] at the number provided.
Consent is not a condition of purchase. Msg and data rates may apply.
Reply STOP to cancel.
Also respect quiet hours. Send texts only within reasonable local daytime hours, which in practice means roughly 8 a.m. to 9 p.m. in the recipient's time zone.
Add SMS steps to your flows
Open your abandoned cart workflow and add an SMS step after the first email, with a delay of a couple of hours and a condition that skips shoppers who already ordered. Add SMS to your welcome flow and shipping updates next. Keep campaign texts to a few a month, reserved for real news.
Hi [First name], you left something in your cart at [Store name].
Finish checkout here: [link]. Reply STOP to opt out.
That message fits comfortably inside one segment before the link expands, and it carries the opt-out language. Do not send the same text and email at the same minute. Stagger them so the second message feels like a follow-up, not a duplicate.
SMS belongs on top of working email flows, never in place of them.
Common problems and how to fix them
Most Omnisend WooCommerce problems trace back to blocked requests, caching, permissions, or duplicated tools. Match your symptom in the table, apply the fix, and rerun the Step 4 test to confirm it worked.
Fixes for the most common issues
| Symptom | Likely cause | Fix |
|---|---|---|
| Contacts or orders do not sync | Plain permalinks, or a firewall or security plugin blocking API requests | Switch permalinks to a non-plain structure, and allow Omnisend in your security plugin or CDN firewall |
| No browse or cart events | Caching or optimization plugin delaying or minifying the tracking script | Exclude the Omnisend script from JavaScript delay and minify, then clear the cache |
| Abandoned cart flow never fires | Shopper not identified, or workflow still in draft | Capture email earlier through forms or checkout, and confirm the workflow is live |
| Form does not appear | Form unpublished, display rules too strict, or script blocked | Publish the form, relax rules, and recheck the script |
| Buyers get two order emails | WooCommerce and Omnisend both send confirmations | Disable the WooCommerce email you replaced |
| Test data in your real audience | A staging site connected to the live account | Disconnect staging and remove the test contacts |
| Emails land in spam | Domain not authenticated, or a stale or unengaged list | Complete authentication and suppress long-inactive contacts |
When a fix does not work, reproduce the issue with your test contact first. Guessing across caching, firewalls, and workflow settings at once wastes time. Change one thing, test, and move on.
What to monitor after launch
Check four things weekly for the first month: revenue from each flow, bounce rate, unsubscribe rate, and spam complaints. Google tells bulk senders to keep complaint rates under 0.1% and never reach 0.3%, so treat a rising complaint rate as an early warning. If flow revenue is thin, look first at whether your forms are capturing enough emails, since flows can only message people you can identify.
After a few weeks of data, start testing one variable at a time: subject lines, send timing, offer, and creative. Small gains in a cart flow compound because it runs on every abandoned cart.
Test one change at a time, and let your own data set the timing.
Getting your Omnisend setup live
The setup comes down to a short chain: create the account, install the plugin, connect and verify the sync, collect consent properly, authenticate your domain, and launch the flows that earn the most. Skipping the test in Step 4 is where most stores go wrong, so do not skip it. SMS comes last, on top of email flows that already work.
If you would rather hand this off, book a strategy call with Chromex Marketing. We audit your current setup, build and test the flows, and manage email and SMS on Omnisend or Klaviyo. As an official Omnisend partner, we also offer 20% off your first 2 months, as cashback, when you sign up through our link, so ask about it on the call.